Thursday, November 22, 2018

Verwendung von Vaporesso Veco Solo Kit - Anleitung - Deutsch

Danke dafür, dass Sie sich für die Vaporesso-Produkte entschieden haben! Lesen Sie dieses Handbuch bitte sorgfältig durch, um die korrekte Anwendung zu gewährleisten. Für weitere Informationen oder Fragen bzgl. Dieses Produkts oder seiner Anwendung, besuchen Sie bitte www.vaporesso.com


Hauptmerkmale 

● Eingebaute Eco-Universal-Spule
● Revolutionäres, leckdichtes Design
● Oberer Luftaustritt
● Leichtes Spulenwechselsystem
● Elegantes und modernes Design
● Pass-Through

Das Paket beinhaltet 

1 x VECO SOLO Kit mit vorinstallierter ECO Universal Coil
1 x Ersatz- ECO Universal Coil
1 x USB-Ladekabel


Spezifikation 


Dimensionen: 22 x100mm
Gewicht:82+/-5 g
Standby-Strom:﹤30uA

Batterie: 

Eingebaute Lithium 1500mAh Guss: Zink-Legierung und Edelstahl Gewinde: 510-Gewinde Kapazität: 2 ml

Als ein neues Mitglied der VECO-Familie ist VECO SOLO Kit von Vaporesso schlanker in der Konstruktion unter der Aufrechterhaltung des reibungslosen Luftstroms. Es nimmt die ECO Universal Coil (EUC) an, so dass Sie nur die Kopfspule innen ersetzen benötigen, ohne die Metallhülse zu wechseln, die wirklich zu ECO freundlich ist. Durch die Kombination der Vorteile von Vapor Pen und All-in-On ist der Behälter auf die Basis gebaut, so dass Sie leicht die Spule ändern oder den Behälter löschen können, wenn es in einer kompakten Konstruktion nötig ist. VECO SOLO, das Richtige für Sie!

Gebrauchsanleitung 

1. Ein-/Aus-Schalter: 

Betätigen Sie die Einschalttaste 5 mal kurz hintereinanderinnerhalb von 2 Sekunden,um das Gerät einzuschalten. Gleichermaßen wird das Gerät nach 5 maliger Betätigung der Ausschalttaste ausgeschaltet.

2.Vaping: 

Halten Sie die Feuer-Taste gedrückt und atmen Sie durch das Mundstück ein. Lassen Sie die Feuer-Taste los und atmen Sie aus.

3. Einfüllen von E-Flüssigkeit:


Der Behälter dieses einfach zufüllenden oberen Auffülltanks lässt sich nur füllen, wenn Sie den Deckelherausschrauben und die Basis sicher geschlossen ist. Stellen Sie sicher, dass das Glasteil während dieses Vorgangs sicher positioniert ist, um ein Verschütten zu vermeiden.

4. Zerstäuber wechseln: 


Schrauben Sie den Behälter von der Basis ab, um einen neuen Zerstäuber zu entfernen und einzustecken. Ziehen Sie den EUC aus der Basis und stecken Sie einen neuen ein. Schrauben Sie die Basis an. Warten Sie nach dem Ersetzen, um sicherzustellen, dass die Spule gut grundiert wird.

5.Aufladen: 

Laden Sie den VECO SOLO Kit einfach, indem Sie ihn an einem Computer oder einem Wand-Adapter anhand eines USB-Kabels anschließen. Das Licht der Schaltfläche erlischt, sobald es vollständig geladen ist. Die LED-Anzeige werden weiß, ist der Akku mehr als 70%. Blau ist der Akku mehr als 30% und rot ist der Akku weniger als 30%.


Funktion: 

Kurzschluss-Schutzvorrichtung: 

1. Wenn der Kurzschluss vor dem Funktionieren auftritt, blinkt die Taste 5-Mal und es ist keine Ausgangsleistung verfügbar.

2. Niedriger Wattzahl-Schutz Sobald die Spannung der Batterie 3V unterschreitet, blinkt die Feuer-Taste 3 Mal und die Batterie wird gesperrt.

3. Schutz gegen übermäßiges Vaping Wenn die Feuer-Taste länger als 10 Sekunden gedrückt wird, blinkt das Licht 3 Mal und erlischt anschließend. Die Batterie wird gesperrt.

4. Batterietiefstandschutz Wenn der Akkustand unter 10% ist, blinkt das Licht, bis es völlig erlischt.

Thursday, November 15, 2018

Wismec Bellerophon RTAのインストール方法 - Wismec Guide

リヨン方法


1.  RTA組み立て
① 組み立てる前に、あなたの手をきれいにすること。
② 噴霧器の蛇口を切り離しおかください。
③ まず、リングを毎ください。 リングを一番、それを暖め、徐々に冷却します。
④ アルフィットした綿を準備すること。 綿を切り取り、それをうちペーストおかください。 芯をある程度カット長すぎたり、短すぎないことを確認してください。
⑤ 綿を浸し芯を調整するための液体を使用してください。


2.  E-液体充填
① 片手でタンクを持って、他の片手でタンクの水滴を除去して、蓋を開けてください。
② タンクを45度の角度で保持する二つの穴を介してE-液を入れて、中央の空気の流れ管に落ちないように注意して下さい。
③蛇口を慎重にしっかりと閉じてください。オーガニックコットンが完全に飽和される ように数分待ちます。


3. 空気の流れの調整 下部の空気の流れ調節リングを回して気流を自由に調節することができます。

保証 保証規定については WISMEC 販売店にお問い合わせください。ユーザーの間違った取 り扱いによる損害については責任を負いません。

警告 小児の手の届かないところに保管してください。

禁忌
1. 修理は Wismec にのみおまかせください。破損やけがの原因となるため、ユニット を自分で修理しようとしないでください。
2. 製品を高温多湿の場所に放置しないでください。製品が損傷する可能性があります。 適切な動作温度は充電中は 0°C-45°C、使用中は -10℃-60℃ です。
3. 水に近づけないでください。


Thursday, November 8, 2018

How to Use Wismec Reuleaux RX Machina Kit - User Manual

Reuleaux RX Machina Overview


How to use:

Unscrew the battery top cap, put one 20700 cell (or a 18650 cell with the help of battery sleeve) into the battery tube. Screw up the battery top cap and install the atomizer, keep pressing the fire button and inhale. (Note: Please be careful not to use battery with torn shell for safety.)


Guillotine RDA Overview


How to use:


1. The two terminals on the post are positive pole and negative pole separately. You can fix the pre-made or self-built coil with cotton.
2. Put the atomizer tube onto the atomizer base.
3. Drip a few drops of e-liquid into the coil and cotton directly to make them fully saturated before use.
4. Put the top cap with mouthpiece onto the base.


E-liquid Filling:

Unplug the top cap with mouthpiece and drop some e-liquid into the juice wells directly. After filling, fit on the mouthpiece again.

Adjustment of Air Inflow:

By rotating the top cap clockwise or counterclockwise, you can adjust the airflow and get different vaping experiences.

Warranty

Please consult with your WISMEC distributors for warranty policy. We are not responsible for any damage caused by user error.
This warranty is only valid for authentic WISMEC products within warranty period from date of purchase by the end user.

Warning


1. Keep out of reach of children.
2. This product is not recommended for use by young people, non-smokers, pregnant or breast-feeding women, persons who are allergic/sensitive to nicotine.


Contra-indication


1. Only have your product repaired by Wismec. Do not attempt to repair the unit by yourself as damage or personal injury may occur.
2. Do not leave the product in high temperature or damp conditions, as this may damage the product. The appropriate operation temperature is within 0°C to 45°C while charging and -10°C to 60°C while in use.
3. Keep away from water.

Possible adverse effects


1. Use of this product may cause damage to health.
2. For people with adverse reaction after using this product, it is recommended to use the juice with lower nicotine content or no nicotine.

A Vape Kit for Beginner | IJOY Stick VPC Vape Pod Kit

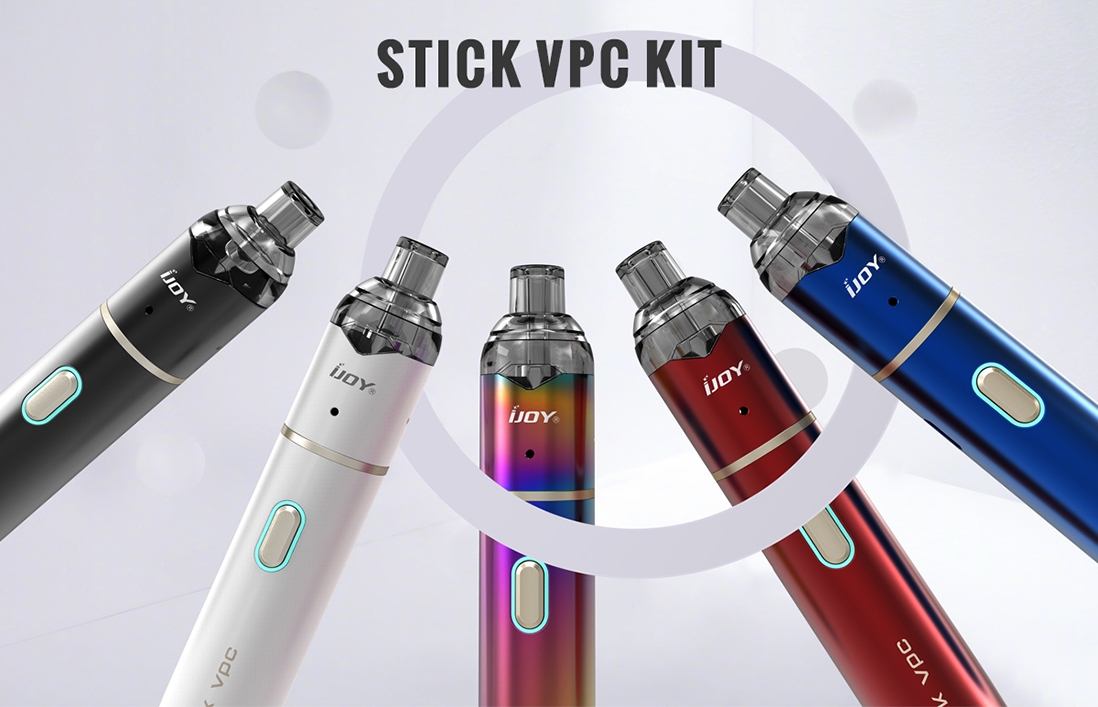
If you are trying to smoke for the first time, I suggest that you choose IJOY Stick VPC Vape Pod Kit, a very excellent vape kit for beginner.

IJOY Stick VPC Vape Pod Kit with VPC 1.6 POD 1100mAh


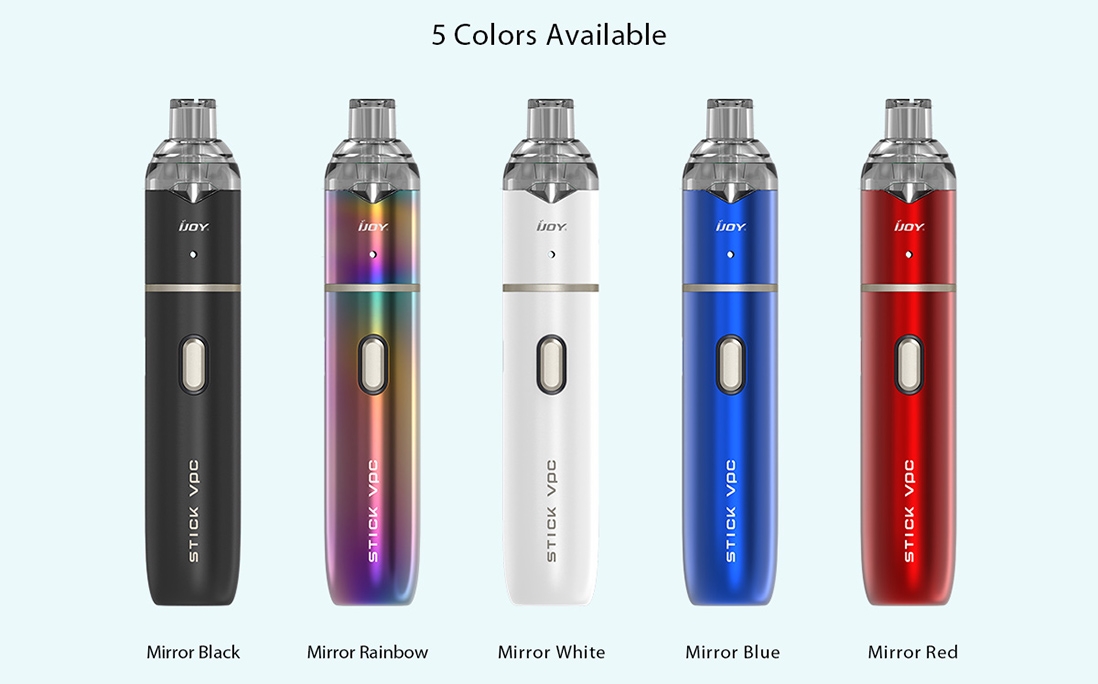
IJOY Stick VPC Kit with pen-shaped design, a perfect nicotine vape pod kit, comes with Stick VPC Mod and VPC 1.6 POD. It comes with only one operate button, so we can't worry operate mistake.

The battery mod features all-in-one metal button and 3-color LED battery life indicator, not only give you comfortable hand feeling, but also illustrate the battery storage.

Working with built-in ceramic coil which performs better than standard coils, the Stick VPC Kit will bring you outstanding vaping experience with purer flavor and huge clouds.
IJOY Stick VPC Vape Pod Kit with VPC 1.6 POD 1100mAh


Where can we buy a  IJOY Stick VPC Vape Pod Kit?  For my part, I recommend the Clumix Online Store, with strong strength, Clumix Online Store has a large inventory, customers do not have to worry about the quantity and quality, and we also will has perfect after-sales service, multi-platform service for our.

Wednesday, November 7, 2018

Boosting Good News | Discount in Limited Time for SMOK Vape Pen 22 Kit

Now, there is a boosting good news for all of your guys. The SMOK Vape Pen 22 Kit is discount in limited time. You purchase it you will get 39% discount that means you can buy it just spend only $12.00 now. There are only 100 left, please take the time to purchase one. Promotion start time is 12 clock Nov 8, 2018,  and the promotion activity just lasting one day, so you should't bind your hand anymore.
SMOK Vape Pen 22 Kit

 Following is the introduction about SMOK Vape Pen 22 Kit
1. Simplicity design with 22mm diameter

2. Powered by internal 1650mAh battery

3. Detachable and reassemble structure for convenient cleaning

4. Micro-USB port for charging

5. One button for all operation

6. Two air slots for airflow

7. Multiple protections for safe

8. Intelligent battery life indicator

9. Convenient top-cap filling design

Where can we buy a SMOK Vape Pen 22 Kit? I highly recommend the cloumix online store. With strong strength, customers do not have to worry about the quality, and have perfect after-sales service, multi-platform for you.


Monday, November 5, 2018

How Can You Get the Yocan Hive 2.0 Kit

Yocan Hive 2.0 Kit
Yocan Hive 2.0 Kit features are following:
1. Compact and portable size
2. All-in-one design for both juices and concentrates
3. Connected by magnetic connection
4. Adjustable voltage (Low/ Middle/ High)
5. USB port for quickly charging

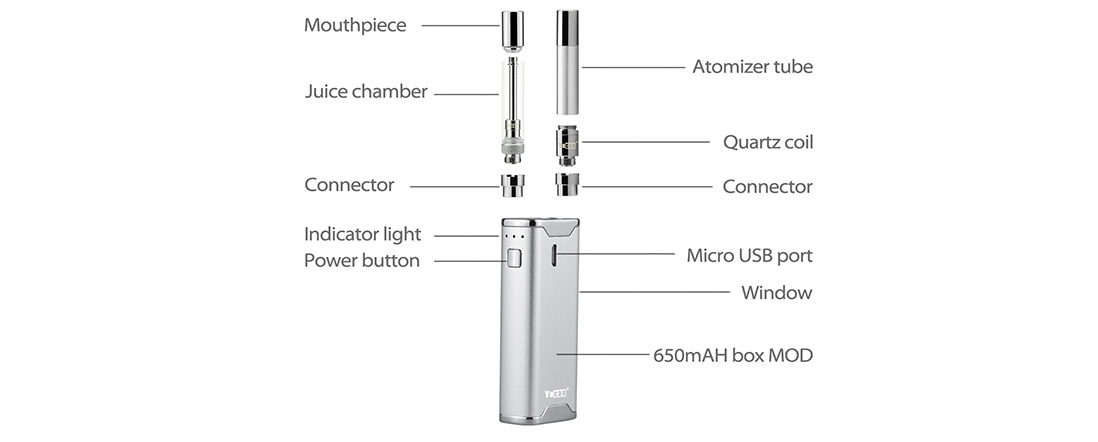
Yocan Hive 2.0 Kit , an all-in-one device, comes with a juice atomizer and a concentrate atomizer. You will have two top level experiences with the Hive 2.0.

The concentrate atomizer is with the quartz coil, providing you the purest vaping. The juice atomizer features top filling and No-leaking designs.

It is easier to check the oil level by the window on box mod. With a magnetic connector, the kit is much more convenient to use and carry. In addition, the output voltage can be adjusted.


Yocan Hive 2.0 Kit


Friday, November 2, 2018

Vzone Graffiti 220W Vape Mod Instruction - Vape Guide

How to Use Vzone Graffiti 220W?


1. Power On: 


Remove the battery cover and insert one high-rate 18650/20700 cells into the device body. The device will power on and display the Vzone Logo.
(Note: Before using, please adjust the wattage to a proper range to match the atomizer you see.)

2. Power Off: 

Press the fire button 5 times continuously to turn off the device.

3. Vaping: 

Press and hold the fire button to vape. Release to fire button to stop.


4. Power Lock/Unlock: 

In KA mode, hold down both fire button and down button to lock/unlock the device power.


5. Temperature Lock/Unlock: 

In TC/TCR mode, hold down both fire button and down button to lock/unlock the temperature.


6. Adjust Power Option: 

When the device is powered on, press the up/down button to adjust wattage accordingly. Wattage will move in 0.5 increments. Press and hold up or down button to adjust wattage rapidly.

7. New coil, Same Coil: 

When you connect a new atomizer or disconnect and reconnect your existing atomizer, the device will prompt you to confirm this change. If you have attached a new atomizer, press the UP button. If you disconnect and reconnect the same atomizer, press the DOWN button.


8. Charging: 

Use the Vzone USB charger to recharge the device. While the device is recharging, the battery symbol will fluctuate up and down. Once the device is fully charged, the battery symbol will be static.

Powered by Blogger.